
Changing a bike spoke can seem daunting, but it’s a manageable task with the right guidance. At usabikers.net, we provide you with a comprehensive guide on how to replace a spoke, ensuring your ride stays smooth. Learn the essential steps and tips to keep your motorcycle wheel in top condition with our expert advice. For more in-depth tutorials and community support, check out our wheel maintenance and biker community forums today.
1. Understanding When and Why to Change a Bike Spoke
Why Do Bike Spokes Break?
Bike spokes endure significant tension and stress, so understanding why they break is crucial for maintenance. Spokes usually fail due to fatigue, impact damage, or corrosion. According to research from the Motorcycle Safety Foundation (MSF), spoke fatigue is a common issue in motorcycles that undergo frequent and intense usage. Over time, the constant stress of riding wears down the metal, leading to cracks and eventual breakage. Regular inspection and timely replacement can prevent further damage.
How to Identify a Broken Spoke
A broken spoke is usually easy to spot. Here’s what to look for:
- Visual Inspection: Look for spokes that are visibly bent, broken, or missing.
- Sound Check: A clicking or rattling sound while riding can indicate a loose or broken spoke.
- Wheel Wobble: If the wheel wobbles or feels unstable, it could be due to uneven tension caused by a broken spoke.
Can You Ride with a Broken Spoke?
Riding with a broken spoke is generally not recommended. A single broken spoke can compromise the integrity of the wheel, leading to:
- Uneven Weight Distribution: The remaining spokes have to bear more load, increasing the risk of further spoke failures.
- Wheel Damage: The wheel can become misaligned, causing damage to the rim and other components.
- Safety Risk: In severe cases, a broken spoke can lead to wheel collapse, posing a significant safety hazard.
2. Essential Tools and Materials Needed for Bike Spoke Replacement
Before starting the replacement, gather all the necessary tools and materials. Having everything on hand will make the process smoother and more efficient.
What Tools Are Needed to Change a Bike Spoke?
- Spoke Wrench (Spoke Key): This is essential for loosening and tightening spoke nipples.
- Tire Levers: These help in removing the tire from the rim.
- Wrench Set: Needed to remove the wheel from the motorcycle.
- Screwdriver (Flathead): Useful for fine adjustments and removing the rim tape.
- Pliers: For gripping and maneuvering small parts.
- Truing Stand (Optional): For more accurate wheel truing.
What Materials Are Needed to Change a Bike Spoke?
- Replacement Spoke: Make sure it matches the original spoke in length, diameter, and material.
- Replacement Nipple: It’s a good idea to replace the nipple along with the spoke.
- Rim Tape: To protect the inner tube from the spoke ends.
- Lubricant (Oil or Grease): To prevent the spoke and nipple from seizing.
Where to Buy Bike Spokes and Tools
You can find bike spokes and tools at:
- Local Bike Shops: These shops offer expert advice and a wide range of parts.
- Online Retailers: Websites like Amazon, usabikers.net, and specialized motorcycle parts stores have extensive selections.
- Motorcycle Dealerships: Dealerships often carry parts specific to certain motorcycle brands and models.
3. Step-by-Step Guide on How to Change a Bike Spoke
Follow these steps to replace a bike spoke effectively and safely.
Step 1: Remove the Wheel
- Secure the Motorcycle: Place the motorcycle on a stable surface or use a motorcycle jack.
 Securing a motorcycle for wheel removal
 - Loosen the Axle Nut: Use a wrench to loosen the axle nut.
- Remove Brake Calipers (if necessary): Detach the brake calipers to free up the wheel.
- Remove the Wheel: Carefully slide the wheel out of the motorcycle frame.
Step 2: Remove the Tire and Tube
- Deflate the Tire: Completely deflate the tire using a valve core remover or by pressing the valve stem.
- Use Tire Levers: Insert tire levers between the tire and the rim to pry one side of the tire off the rim.
 Using tire levers to remove a motorcycle tire
 - Remove the Tube: Once one side of the tire is off, pull out the inner tube.
Step 3: Remove the Broken Spoke
- Locate the Broken Spoke End: Find where the spoke is broken, either at the hub or the nipple.
- Remove from the Hub: If broken at the hub, simply pull the spoke out.
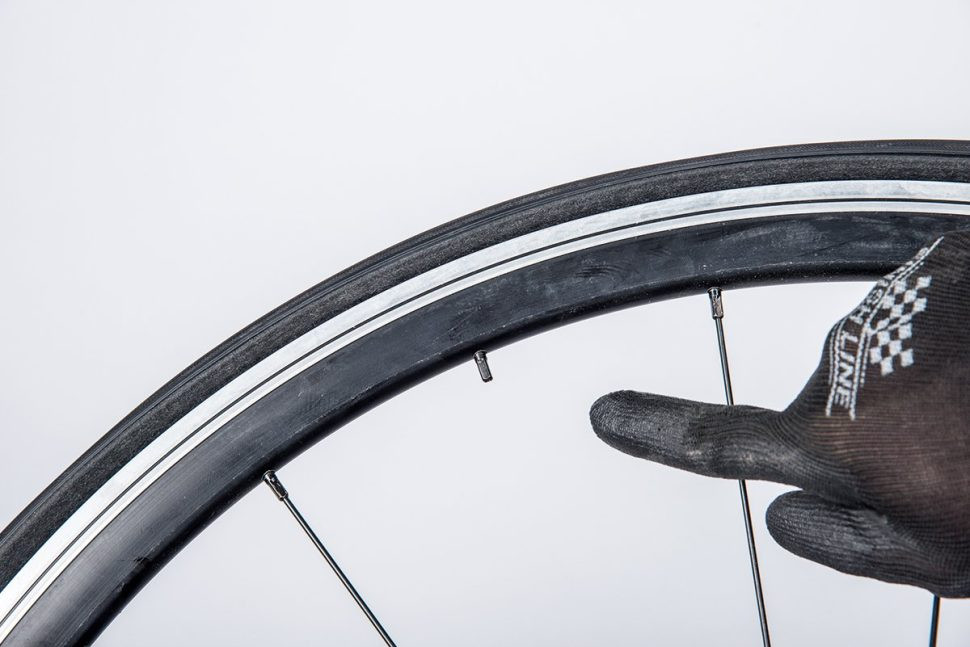
- Remove from the Nipple: If broken at the nipple, you may need to use a spoke wrench to unscrew it from the rim.
- Remove the Nipple: Pry back the rim tape to access the nipple. If it’s lost inside the rim, shake the wheel until it drops out.
Step 4: Install the New Spoke
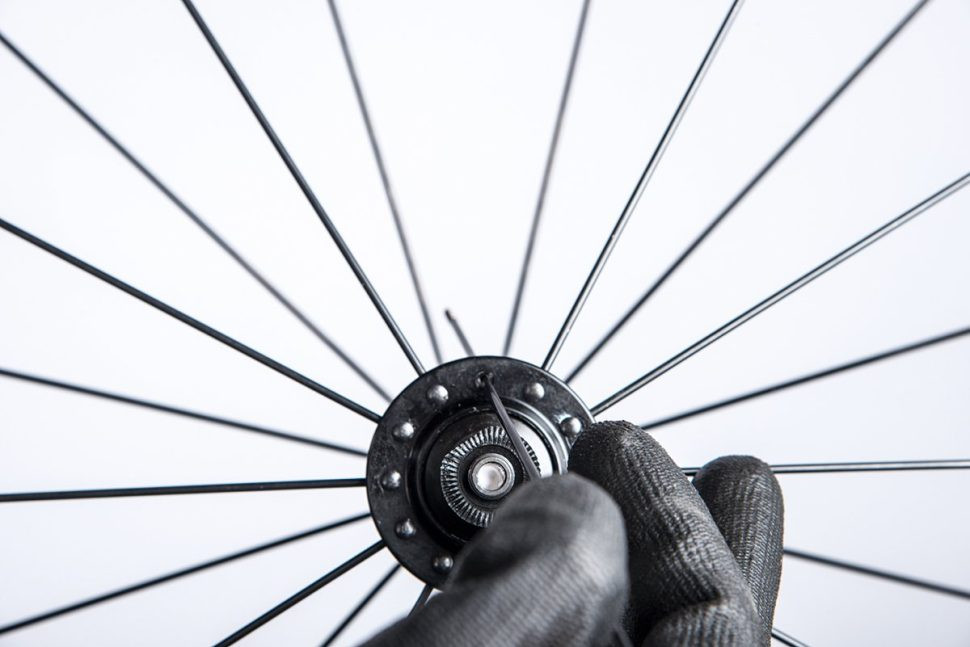
- Insert the Spoke: Insert the new spoke through the hub flange, ensuring it follows the same pattern as the other spokes.
 Inserting a new spoke through the hub of a motorcycle wheel
 - Thread the Nipple: Place the nipple into the rim and thread it onto the spoke.
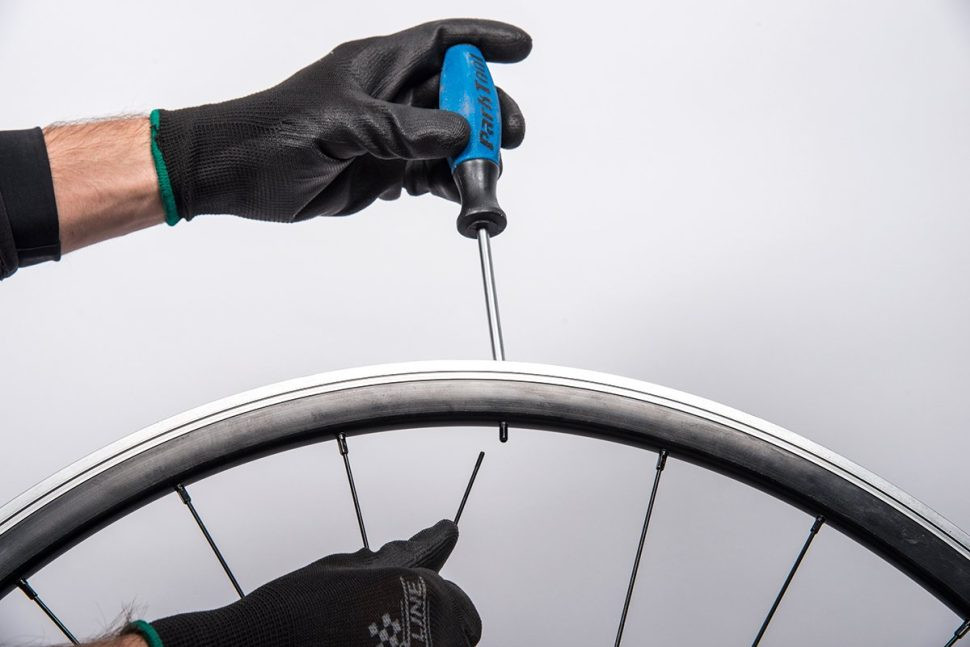
- Tighten the Nipple: Use a flathead screwdriver to tighten the nipple onto the spoke until it is snug.
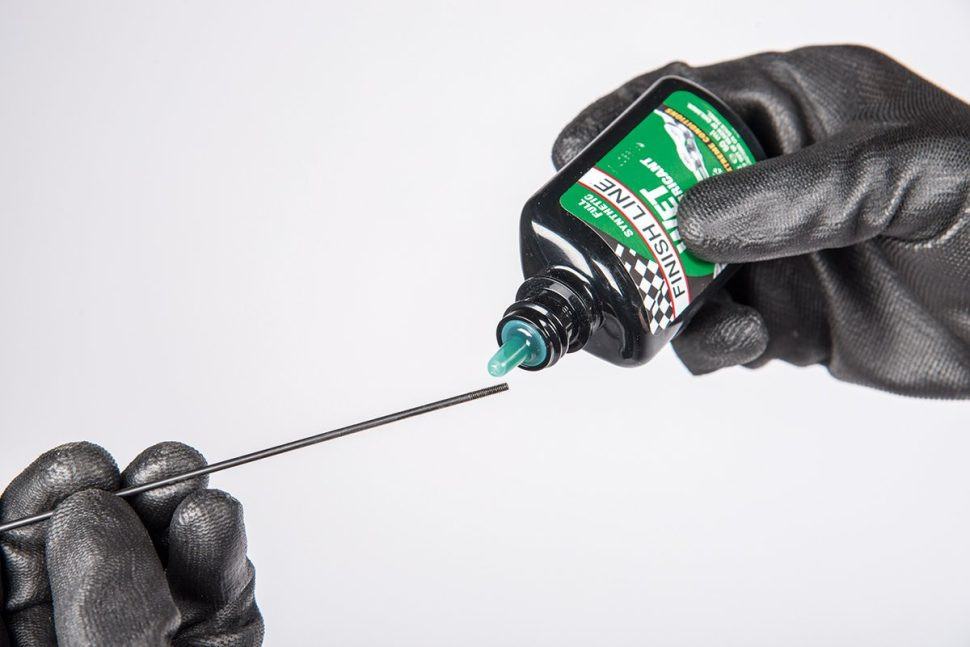
- Apply oil: Apply a drop of oil on the threads and on the nipple to make it less likely to seize and easier to tension.
Step 5: Tension and True the Wheel
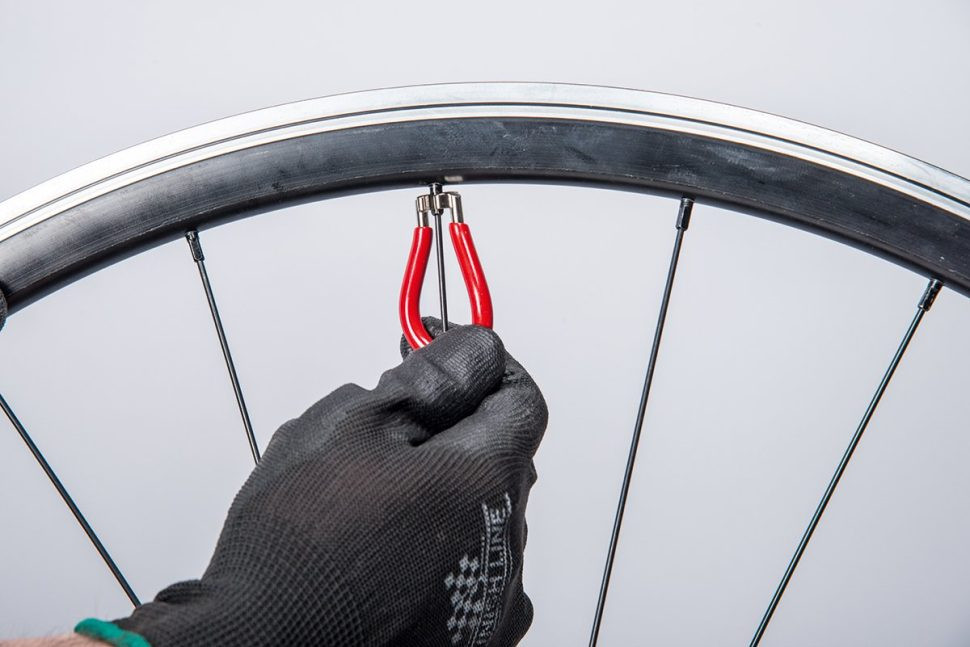
- Initial Tensioning: Use a spoke wrench to tighten the nipple, increasing the tension on the spoke.
 Using a spoke wrench to tension a motorcycle wheel spoke
 - Check Wheel Trueness: Spin the wheel and check for wobbles or deviations.
- Adjust Tension: Tighten or loosen the surrounding spokes to correct any wobbles, ensuring the wheel is true.
- Final Truing: For precise truing, use a truing stand. This allows you to make fine adjustments and achieve a perfectly aligned wheel.
Step 6: Reinstall the Tire and Tube
- Insert the Tube: Carefully place the inner tube back into the tire.
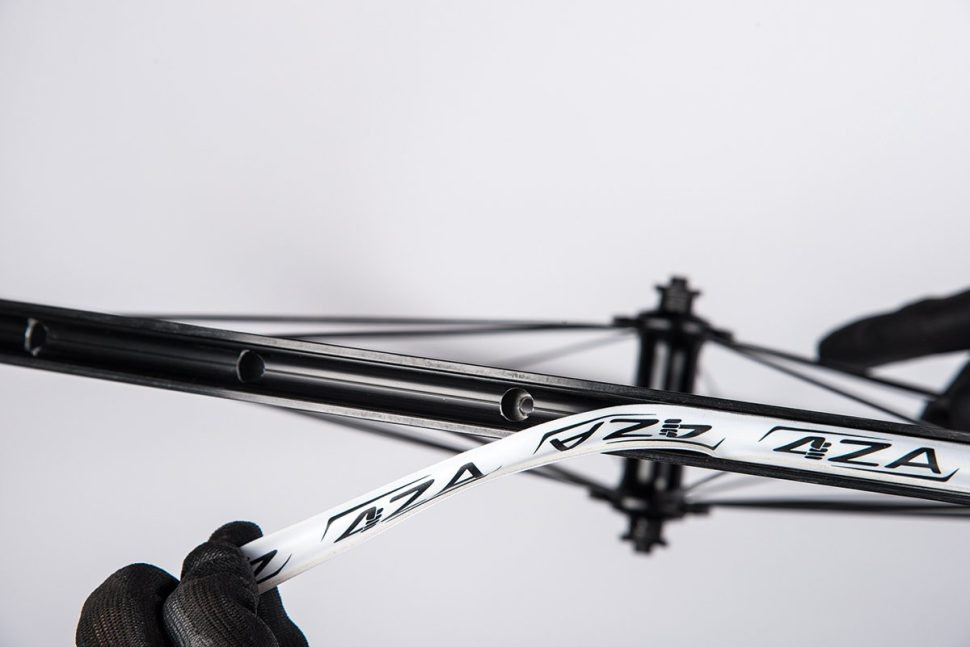
- Seat the Tire: Use tire levers to seat the tire back onto the rim.
- Inflate the Tire: Inflate the tire to the recommended pressure.
- Check Tire Seating: Ensure the tire is evenly seated around the rim.
Step 7: Reinstall the Wheel
- Reattach Brake Calipers: Reattach the brake calipers to the wheel.
- Slide the Wheel Back: Carefully slide the wheel back into the motorcycle frame.
 Reinstalling a motorcycle wheel back onto the motorcycle
 - Tighten the Axle Nut: Tighten the axle nut to the manufacturer’s specified torque.
- Test Ride: Take a short test ride to ensure the wheel is stable and functioning correctly.
4. Advanced Tips for Truing and Tensioning Bike Spokes
Truing and tensioning spokes correctly is essential for wheel longevity and performance. Here are some advanced tips to help you achieve optimal results.
Understanding Spoke Tension
- Uniform Tension: Aim for uniform tension across all spokes. This ensures even load distribution and prevents spoke fatigue.
- Using a Tension Meter: A spoke tension meter can help you measure the tension accurately. Refer to the wheel manufacturer’s specifications for the ideal tension range.
- Tension Patterns: Be aware of tension patterns. Drive-side spokes on the rear wheel typically require higher tension than non-drive-side spokes.
Truing Techniques
- Lateral Truing: Corrects side-to-side wobbles. Tighten spokes on the opposite side of the wobble to pull the rim straight.
- Radial Truing: Corrects up-and-down hops. Tighten or loosen spokes to even out the rim’s vertical alignment.
 Checking the trueness of a motorcycle wheel with a truing stand
 - Dish Adjustment: Ensures the rim is centered over the hub. Use a dishing tool to check and adjust the rim position.
Common Mistakes to Avoid
- Over-Tensioning: Over-tightening spokes can damage the rim and lead to spoke breakage.
- Ignoring Tension Patterns: Neglecting proper tension patterns can result in uneven load distribution and wheel instability.
- Using Incorrect Tools: Using the wrong tools can damage the spoke nipples and make the truing process more difficult.
5. Maintaining Your Bike Spokes for Longevity
Proper maintenance can significantly extend the life of your bike spokes.
Regular Inspection
- Visual Checks: Regularly inspect your spokes for signs of damage, such as bending, corrosion, or cracks.
- Tension Checks: Periodically check spoke tension to ensure it remains within the recommended range.
Cleaning and Lubrication
- Cleaning: Keep your spokes clean to prevent corrosion. Use a mild detergent and water to remove dirt and grime.
- Lubrication: Apply a light lubricant to the spoke threads to prevent seizing. This makes future adjustments easier.
Preventative Measures
- Avoid Impacts: Ride carefully to avoid impacts that can damage your wheels and spokes.
- Proper Storage: Store your motorcycle in a dry place to prevent corrosion.
6. Safety Precautions When Working with Bike Spokes
Safety should always be a top priority when working with bike spokes.
Wearing Protective Gear
- Gloves: Wear gloves to protect your hands from sharp edges and grease.
- Eye Protection: Use safety glasses to protect your eyes from debris.
Working in a Safe Environment
- Stable Surface: Ensure your motorcycle is stable and secure before starting any work.
- Adequate Lighting: Work in a well-lit area to improve visibility and reduce the risk of accidents.
Handling Tools Safely
- Use the Right Tools: Always use the correct tools for the job to avoid damaging components.
- Tool Maintenance: Keep your tools in good condition to ensure they function properly.
7. Diagnosing and Addressing Common Bike Spoke Problems
Identifying and addressing common spoke problems can save you time and money.
Loose Spokes
- Symptoms: Clicking sounds, wheel wobble, and uneven tension.
- Causes: Vibration, improper initial tensioning, and spoke settling.
- Solutions: Tighten the loose spokes using a spoke wrench. Check and adjust the tension of surrounding spokes as well.
Broken Spokes
- Symptoms: Bent or snapped spokes, wheel misalignment, and instability.
- Causes: Impact damage, metal fatigue, and corrosion.
- Solutions: Replace the broken spoke following the steps outlined earlier.
Corroded Spokes
- Symptoms: Rust, pitting, and weakened spokes.
- Causes: Exposure to moisture, salt, and other corrosive elements.
- Solutions: Clean the spokes with a rust remover and apply a protective lubricant. Replace severely corroded spokes.
8. When to Seek Professional Help for Bike Spoke Issues
While many spoke issues can be resolved at home, there are situations where professional help is necessary.
Complex Wheel Damage
If the wheel is severely damaged, such as a bent rim or multiple broken spokes, it’s best to consult a professional.
Lack of Experience
If you’re not comfortable working with bike spokes or lack the necessary tools, seek help from a qualified mechanic.
Specialized Wheels
Certain high-performance or specialized wheels may require specific knowledge and tools for maintenance.
9. Exploring Different Types of Bike Spokes and Nipples
Understanding the different types of spokes and nipples can help you choose the best components for your motorcycle.
Spoke Materials
- Stainless Steel: Durable, corrosion-resistant, and a popular choice for most motorcycles.
- Carbon Fiber: Lightweight and strong, but more expensive and typically used in high-performance applications.
Spoke Shapes
- Straight Gauge: Uniform thickness along the entire length, offering good strength and durability.
- Butted: Thicker at the ends and thinner in the middle, providing weight savings and improved ride quality.
- Bladed: Aerodynamic shape, reducing wind resistance and improving performance.
Nipple Types
- Brass Nipples: Corrosion-resistant and durable, making them a reliable choice for most applications.
- Aluminum Nipples: Lightweight, but more prone to corrosion and damage.
- Internal Nipples: Offer improved aerodynamics and aesthetics, but can be more difficult to adjust.
10. Community and Resources for Bike Spoke Maintenance
Connecting with other riders and accessing reliable resources can enhance your knowledge and skills in bike spoke maintenance.
Online Forums and Communities
- usabikers.net: Join our community to share experiences, ask questions, and get advice from fellow motorcycle enthusiasts.
- Motorcycle Forums: Websites like ADVrider and MotoStat offer dedicated forums for discussing motorcycle maintenance and repairs.
Local Biker Clubs
Joining a local biker club can provide opportunities for hands-on learning and mentorship.
Educational Resources
- Motorcycle Safety Foundation (MSF): Offers courses and resources on motorcycle maintenance and safety.
- Online Tutorials: Websites like YouTube and usabikers.net provide step-by-step tutorials on bike spoke maintenance.
By following this guide and staying informed, you can confidently maintain your bike spokes and enjoy a safe and smooth ride. Remember to visit usabikers.net for more resources, community support, and the latest updates on motorcycle maintenance and culture. Join our community today and share your experiences with fellow bikers! Contact us at Address: 801 Sturgis Main St, Sturgis, SD 57785, United States. Phone: +1 (605) 347-2000.
FAQ: Changing Motorcycle Spokes
Can I replace a broken spoke myself?
Yes, replacing a broken spoke is a manageable task with the right tools and guidance. Follow our step-by-step guide to ensure a smooth and safe replacement.
What tools do I need to replace a bike spoke?
You’ll need a spoke wrench, tire levers, a wrench set, a screwdriver, pliers, and optionally, a truing stand for more accurate wheel truing.
How do I choose the right replacement spoke?
Measure the old spoke or take it to a bike shop to get a replacement. Ensure it matches the original in length, diameter, and material for optimal performance.
Is it safe to ride with a broken spoke?
No, it’s generally not recommended. Riding with a broken spoke can compromise wheel integrity, leading to further damage and safety risks.
How do I tension bike spokes properly?
Use a spoke wrench to tighten the nipple, increasing tension evenly. Check wheel trueness and adjust surrounding spokes for uniform tension and stability.
What is wheel truing, and why is it important?
Wheel truing involves adjusting spoke tension to correct wobbles and deviations, ensuring the wheel is aligned and balanced for a smoother ride.
How often should I inspect my bike spokes?
Regularly inspect your spokes for signs of damage, such as bending, corrosion, or cracks, to catch and address issues early.
What are common signs of spoke problems?
Common signs include clicking sounds, wheel wobble, bent or broken spokes, and uneven tension. Addressing these issues promptly prevents further damage.
Can corroded spokes be repaired?
Severely corroded spokes should be replaced. For minor corrosion, clean with rust remover and apply a protective lubricant to prevent further damage.
Where can I find reliable resources for bike spoke maintenance?
Explore online forums like usabikers.net, join local biker clubs, and consult educational resources like the Motorcycle Safety Foundation (MSF) for expert guidance.