If your bicycle wheel is wobbly or not perfectly round, it can significantly impact your ride quality and even wear out components faster. Truing your bike wheel, which means making it straight and round again, is a fundamental skill for any cyclist. This guide will walk you through the process of lateral and radial truing, helping you achieve optimal wheel performance and longevity.
Understanding Wheel Truing Basics
Before diving into the steps, let’s understand the anatomy of a bicycle wheel and the principles of wheel truing. A bicycle wheel consists of three main parts: the rim (the outer hoop), the hub (the central part that attaches to the bike frame), and spokes (wires connecting the rim and hub). Spokes are crucial for wheel strength and trueness, pulling the rim from both sides.
Wheel truing is essentially adjusting the tension of these spokes using a spoke wrench. By carefully tightening or loosening specific spokes, we can correct deviations in the wheel’s straightness and roundness, also known as “trueness.” There are four key aspects to consider when truing a wheel, and this article will focus on the first two:
- Lateral Trueness: Correcting side-to-side wobbles or deviations as the wheel rotates. This is especially important for bikes with rim brakes to prevent brake rub.
- Radial Trueness: Addressing the wheel’s roundness, eliminating up-and-down movements as it spins. This ensures a smooth and efficient ride.
- Dish/Centering: Ensuring the wheel is centered within the frame for proper alignment and balance. (Covered in a separate article).
- Spoke Tension: Maintaining consistent and appropriate spoke tension across the wheel for durability and long-lasting trueness. (Covered in a separate article).
For a comprehensive wheel truing job that results in a strong and durable wheel, a professional mechanic typically adjusts spoke tension to optimize all four aspects. However, with the right tools and a bit of patience, you can effectively address lateral and radial trueness at home.
Tools You’ll Need for Wheel Truing
To true a bike wheel effectively, you’ll need a few essential tools:
- Truing Stand (Recommended): A truing stand securely holds the wheel and provides reference points (indicators) to measure deviations. While not mandatory, it significantly simplifies and speeds up the truing process.
- Spoke Wrench: This small wrench is designed to fit securely onto spoke nipples, allowing you to adjust spoke tension. Ensure you have the correct size spoke wrench for your nipples.
- Truing Indicators (If not using a truing stand): If you don’t have a truing stand, you can use zip ties or other flexible materials attached to your bike frame as indicators. These will help you visualize wheel deviations.
- Optional but Helpful:
- Tire Lever: For removing the tire, which can improve visibility during the truing process, especially for beginners.
- Lubricant: A light lubricant can help loosen stiff spoke nipples.
- Bladed Spoke Holder: For wheels with bladed spokes, this tool prevents spoke twisting during tension adjustments.
- Spoke Tension Meter (Tensiometer): For advanced truing, a tensiometer like the Park Tool TM-1 helps measure spoke tension for optimal wheel build.
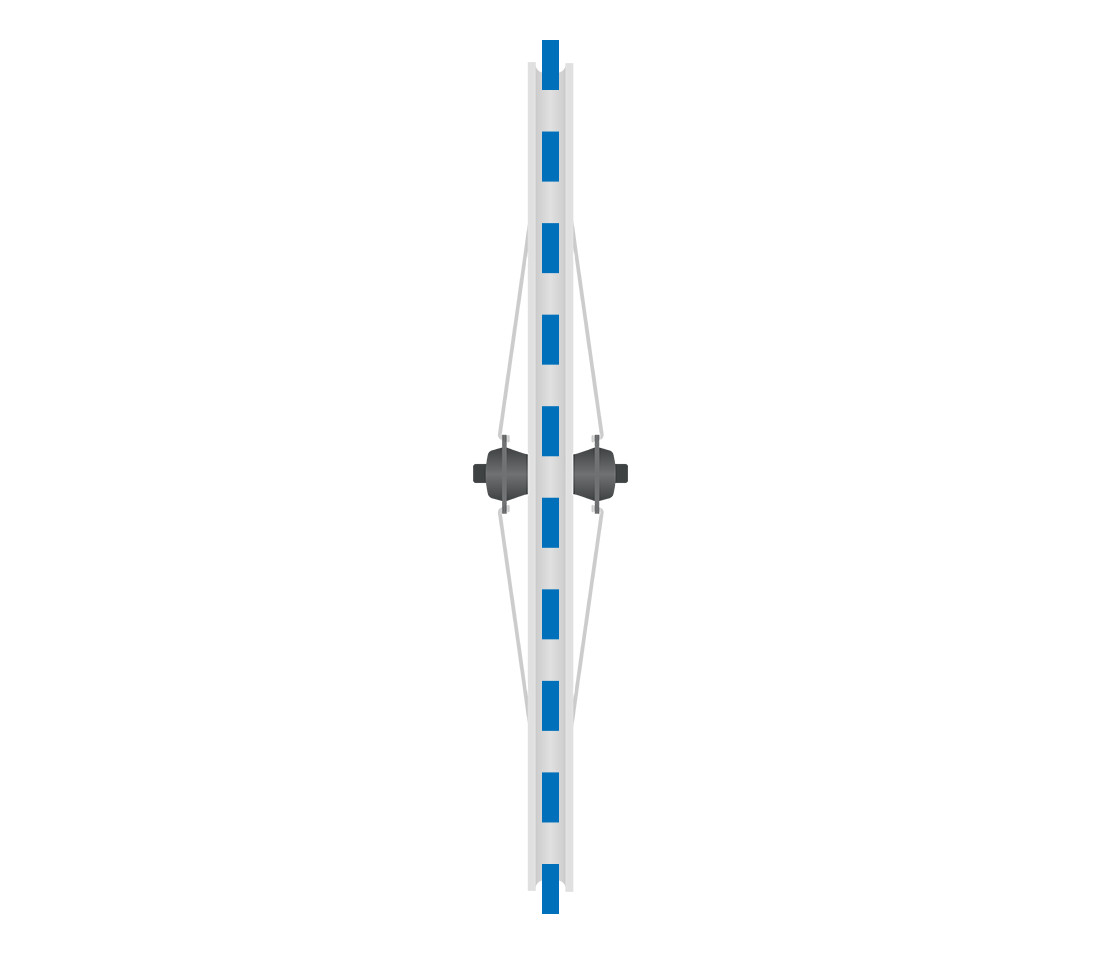 Head-on view of bicycle wheel, with vertical axis aligned with rim showing where lateral deviation is measured
Image: Diagram illustrating lateral trueness, highlighting side-to-side deviation of a bike wheel rim.
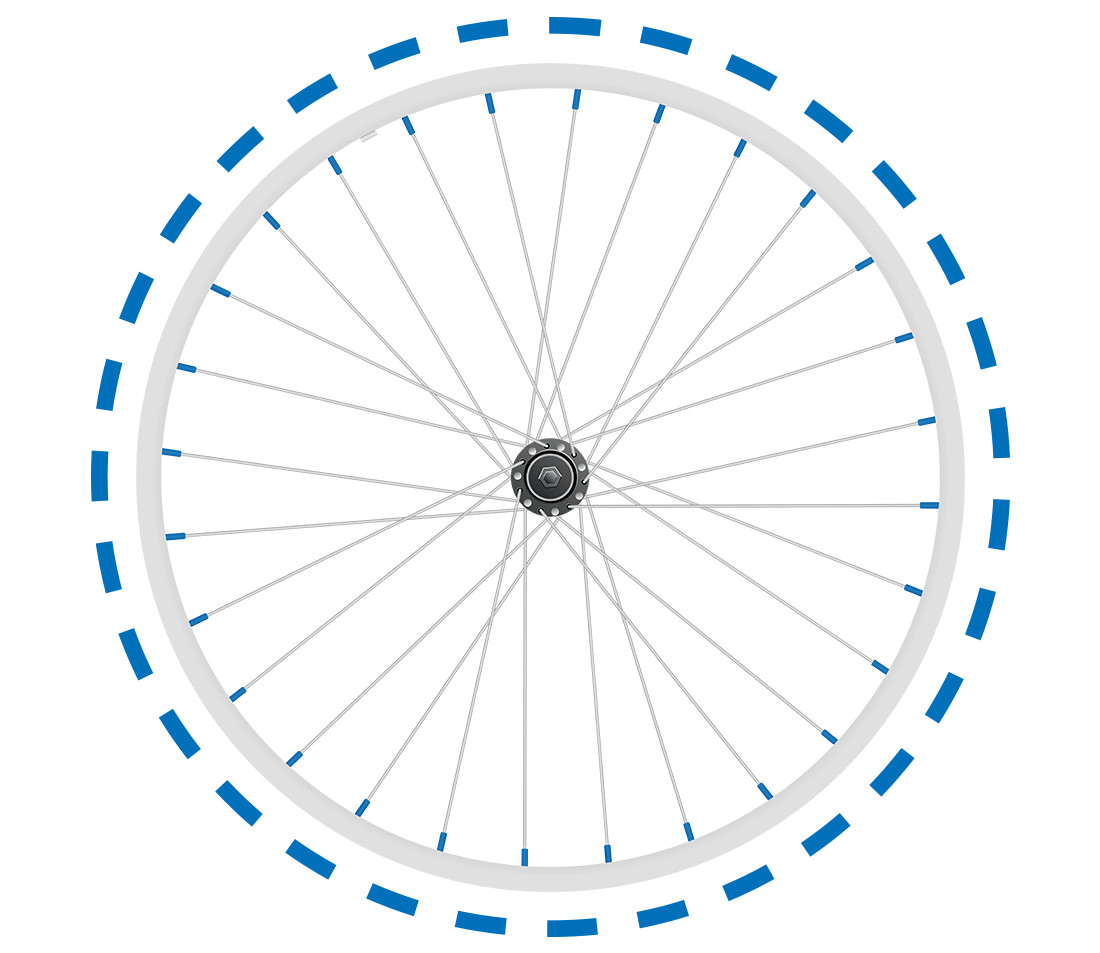 Side view of bicycle wheel with circular axis along its circumference showing how radial deviance is measured
Image: Diagram explaining radial trueness, showing up-and-down deviation in a bicycle wheel’s roundness.
Setting Up for Wheel Truing
Before you start truing, ensure your workspace is ready and the wheel is properly mounted.
Wheel Fixturing:
- Using a Truing Stand: Mount the wheel securely in your truing stand according to the manufacturer’s instructions.
- Using the Bike: If you don’t have a truing stand, you can use your bike frame. Position your bike in a repair stand or carefully turn it upside down, ensuring the wheel can spin freely.
Deviation Tracking:
- Truing Stand Indicators: Adjust the built-in indicator fingers on your truing stand to be close to the rim edge without touching it.
- DIY Indicators: If using your bike, attach zip ties or similar materials to the frame near the rim on both sides. Adjust them to act as indicators, allowing you to see rim deviations as the wheel spins.
Spoke Tension Adjustment:
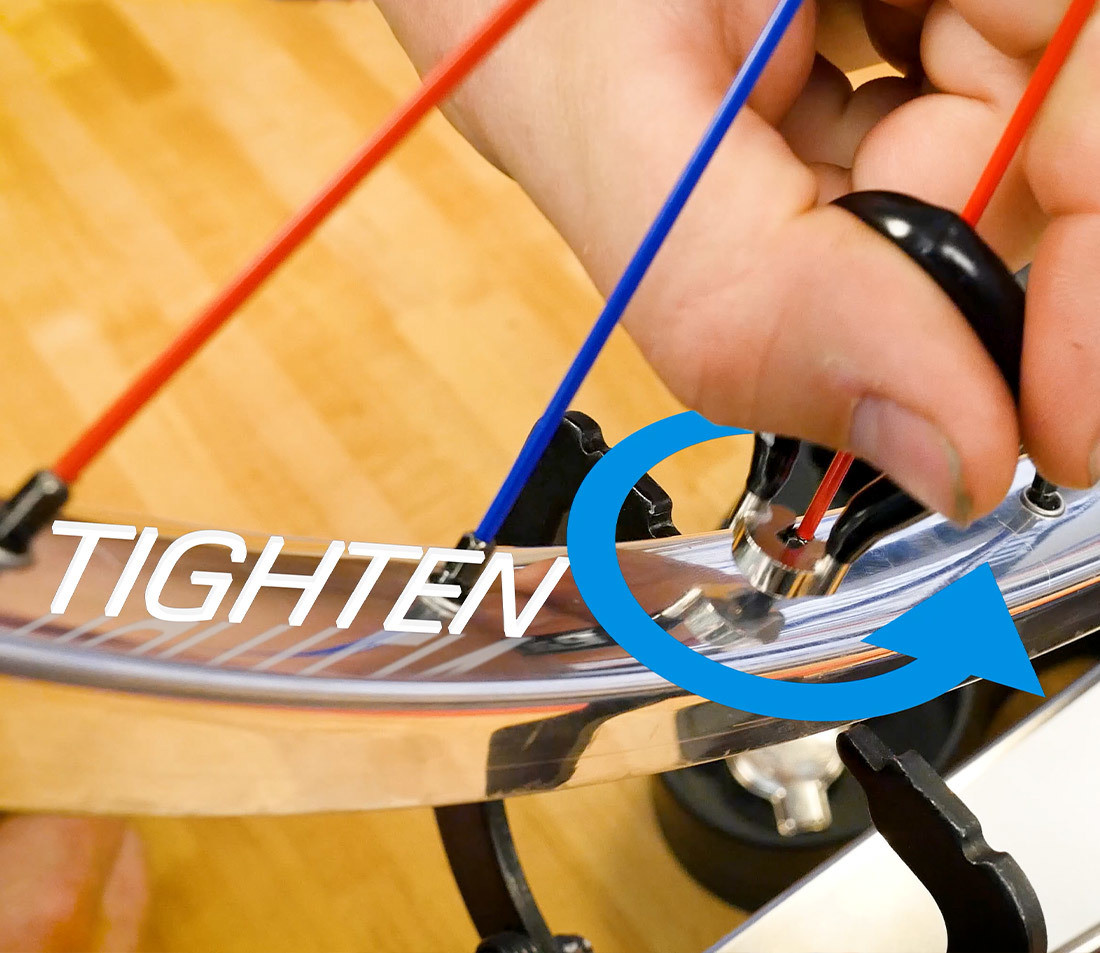
- Spoke Wrench Use: Familiarize yourself with how the spoke wrench engages with the spoke nipples. Remember that looking from the outside of the rim, turning the nipple clockwise generally tightens the spoke, and counterclockwise loosens it. However, when working on a truing stand or upside-down bike, the perspective may seem reversed.
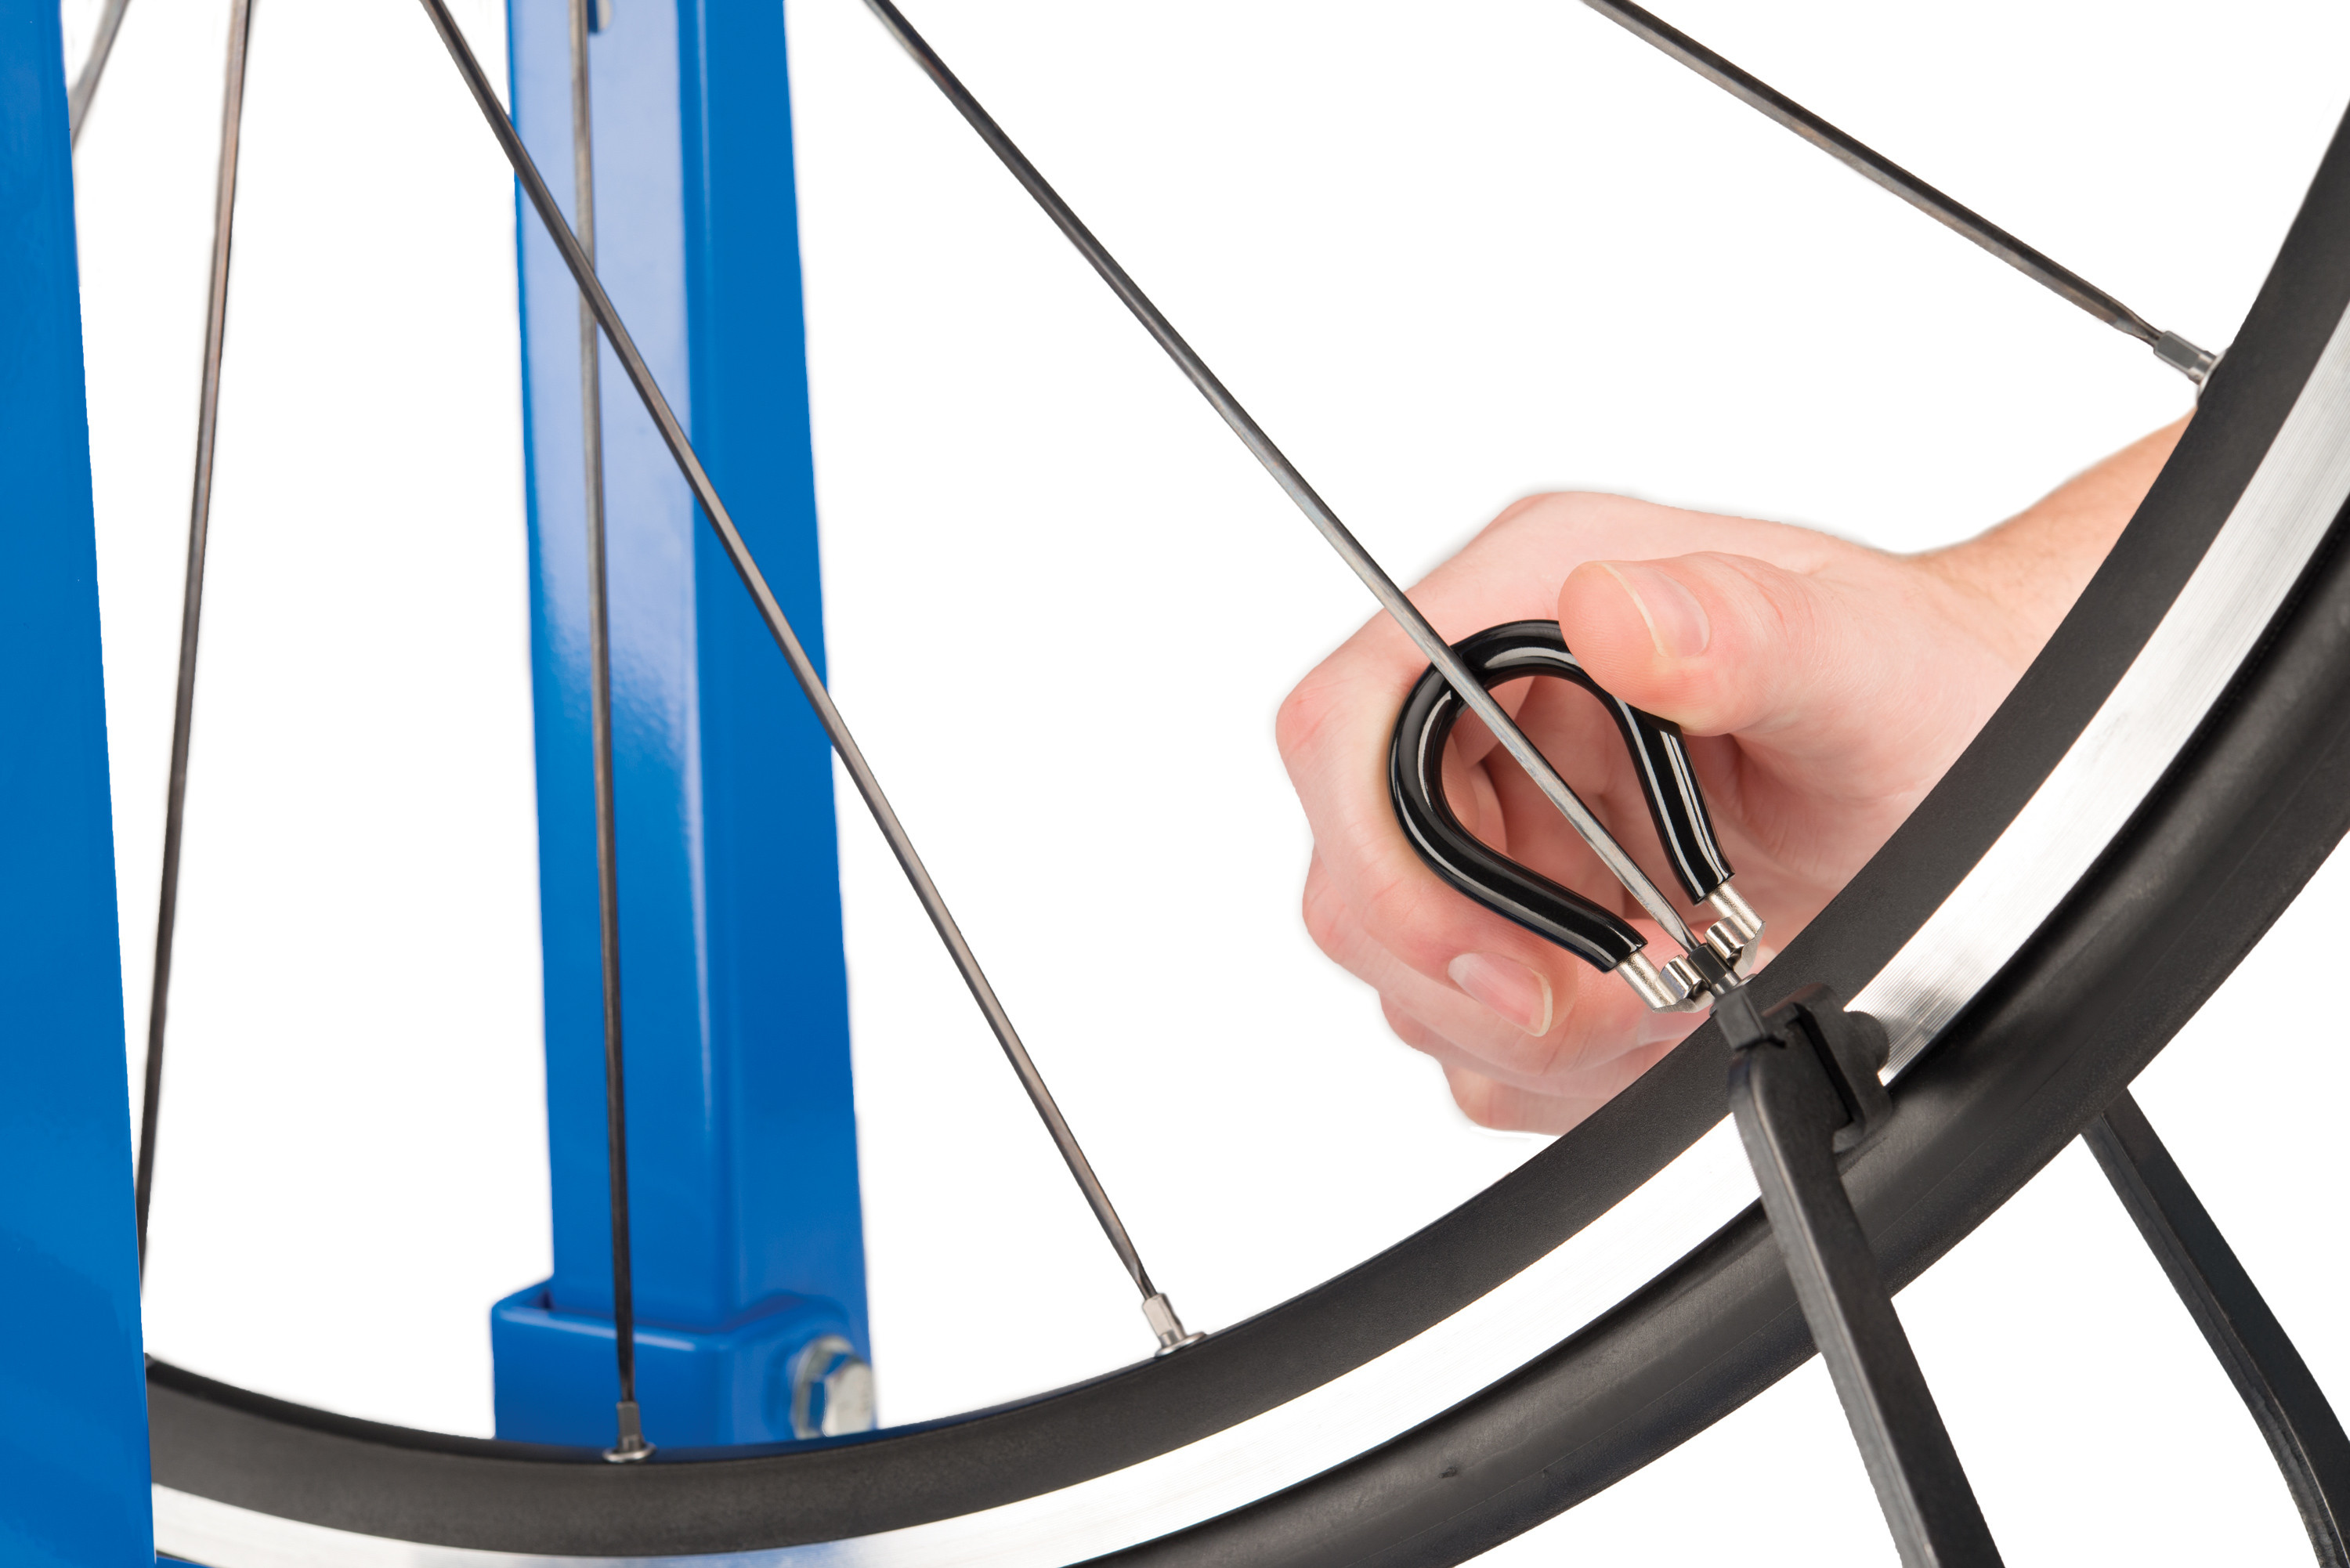 Spoke wrench engaged on a nipple of a bicycle wheel
Image: Close-up of a spoke wrench correctly engaged with a spoke nipple on a bicycle wheel, ready for adjustment in a truing stand.
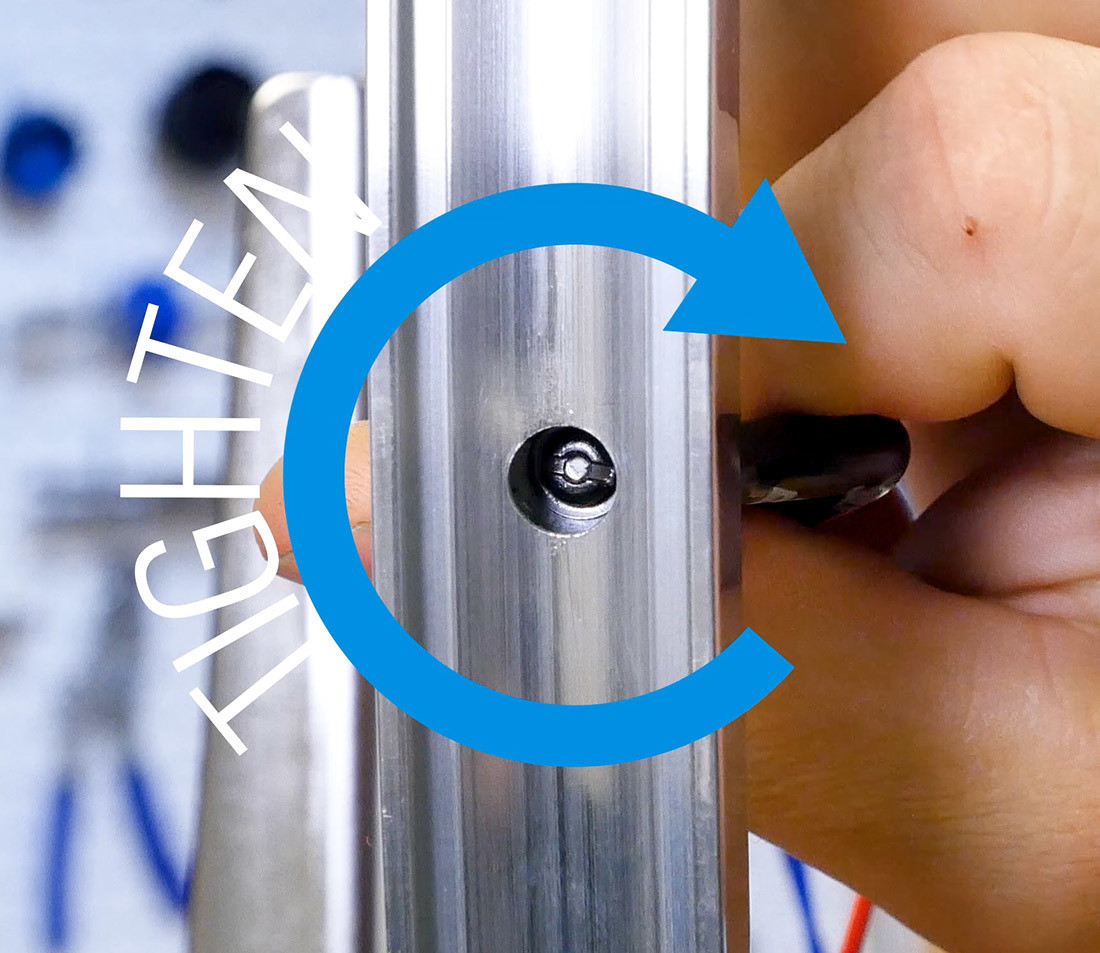 Perspective of tightening a spoke from under the rim
Image: Visual perspective of tightening a spoke nipple from below the bicycle wheel rim, illustrating the clockwise tightening direction.
 Perspective of tightening a spoke from above the rim
Image: Visual perspective of tightening a spoke nipple from above the bicycle wheel rim, showing the apparent counter-clockwise tightening direction from this angle.
Helpful Tips Before You Begin
- Tire Removal: For beginners, removing the tire can make it easier to see lateral deviations and observe the rim’s movement.
- Lubrication: If spoke nipples are stiff or creaky, apply a drop of light lubricant at the spoke-nipple and nipple-rim interfaces. Wipe away any excess to avoid getting lubricant on braking surfaces.
- Bladed Spokes: If your wheels have bladed spokes, use a bladed spoke holder to prevent them from twisting when adjusting nipples.
- Internal Nipples: Some wheels have internal nipples located inside the rim, requiring a specialized spoke wrench for adjustments. Check your wheel type before proceeding.
 Head-on view of bicycle wheel in truing stand, demonstrating the tire hiding the truing stand indicators
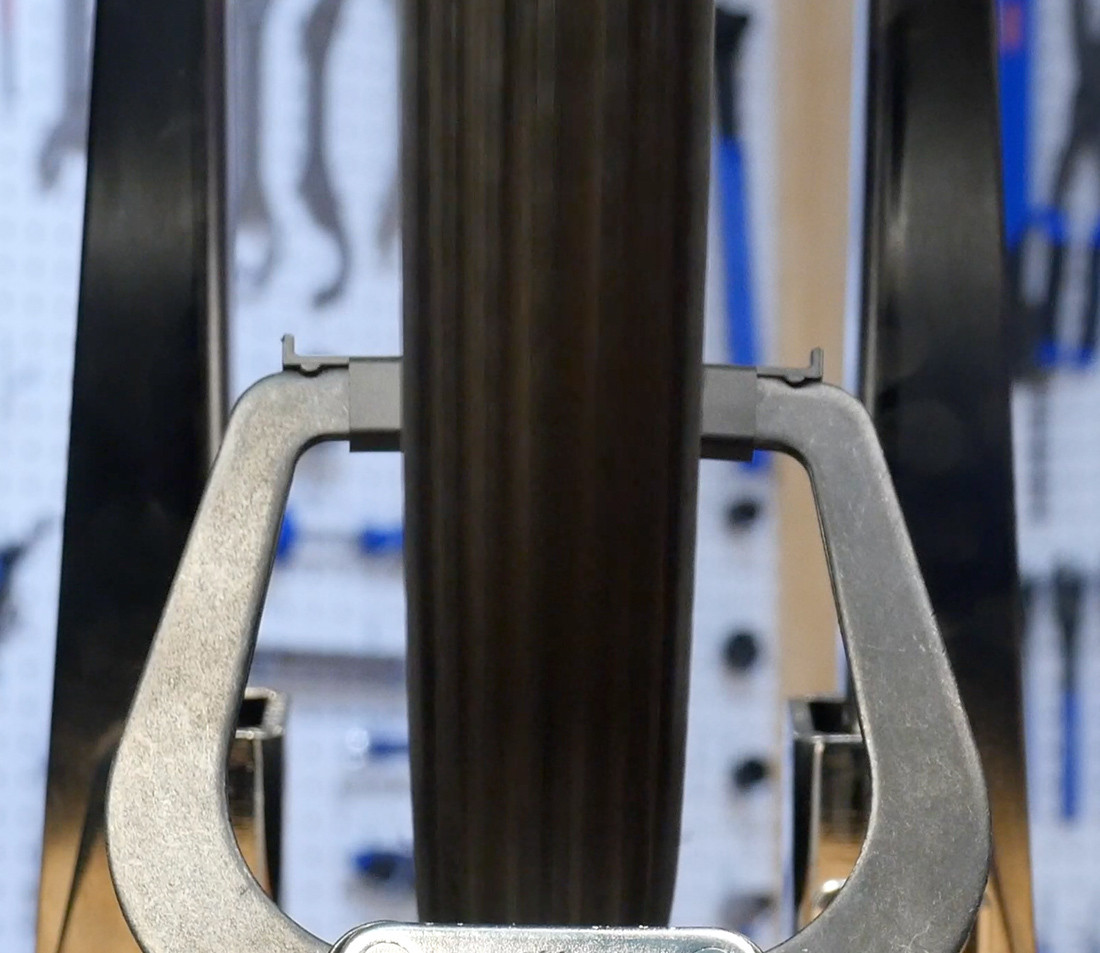
Image: Bicycle wheel in a truing stand, showing how a tire can obstruct the view of truing stand indicators.
 Head-on view of bicycle wheel in truing stand, demonstrating better visibility of indicators with tire removed
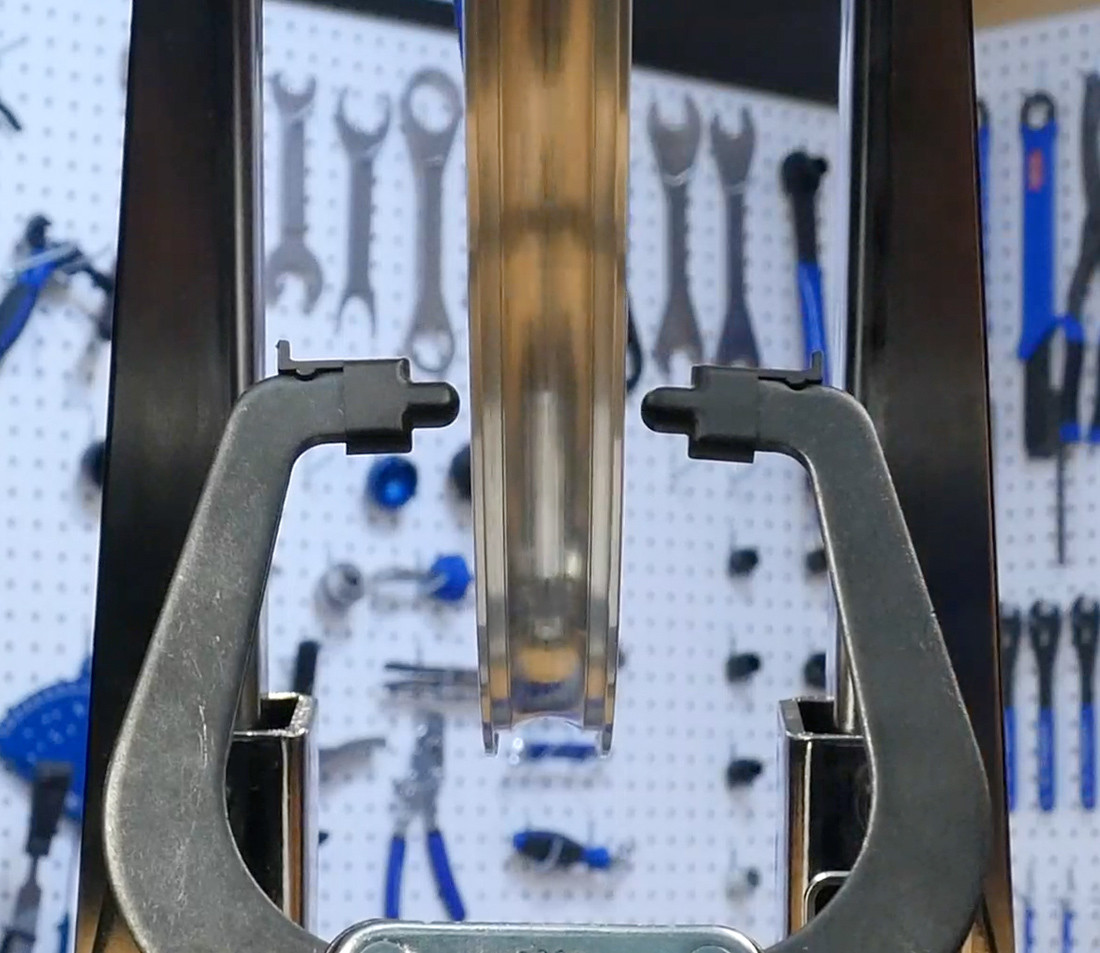
Image: Improved view of truing stand indicators after removing the tire from the bicycle wheel, making the truing process clearer.
 Bladed bicycle spoke being held in place by a bladed spoke holder
Image: A bladed spoke holder securing a bladed bicycle spoke while the nipple is being adjusted, preventing twisting and damage.
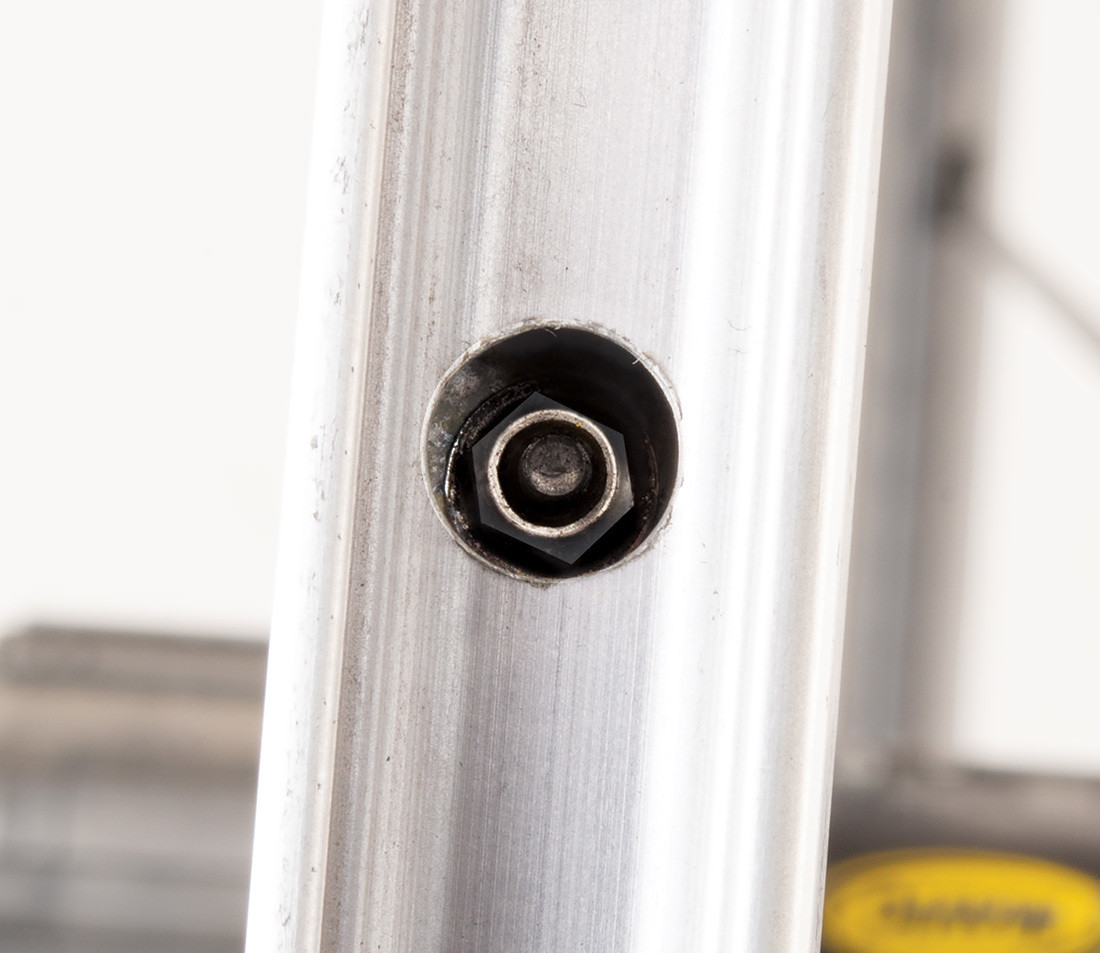 View of internal nipple installed on a bicycle wheel
Image: Close-up view of an internal spoke nipple installed within a bicycle wheel rim, common in some modern wheel designs.
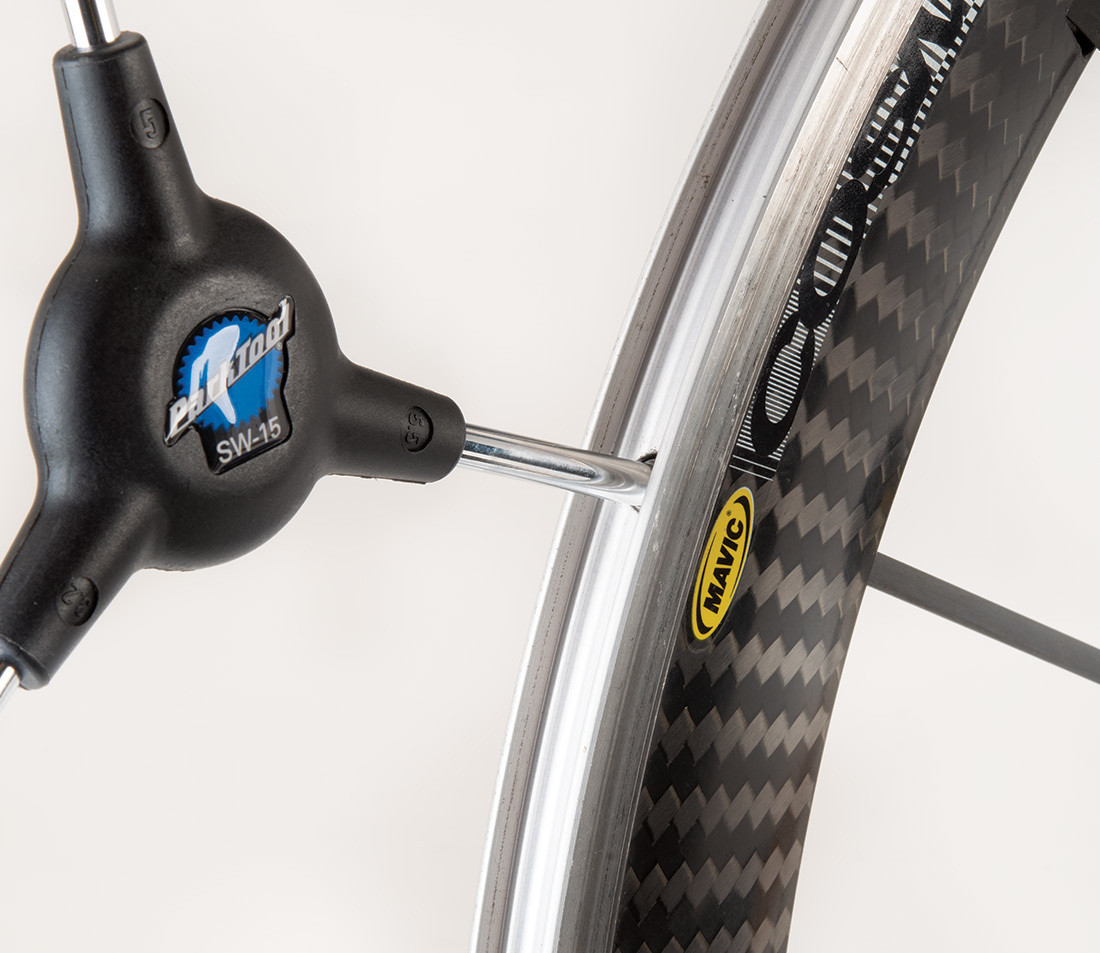 SW-15 Spoke Wrench with end on internal spoke nipple of carbon fiber road bike rim
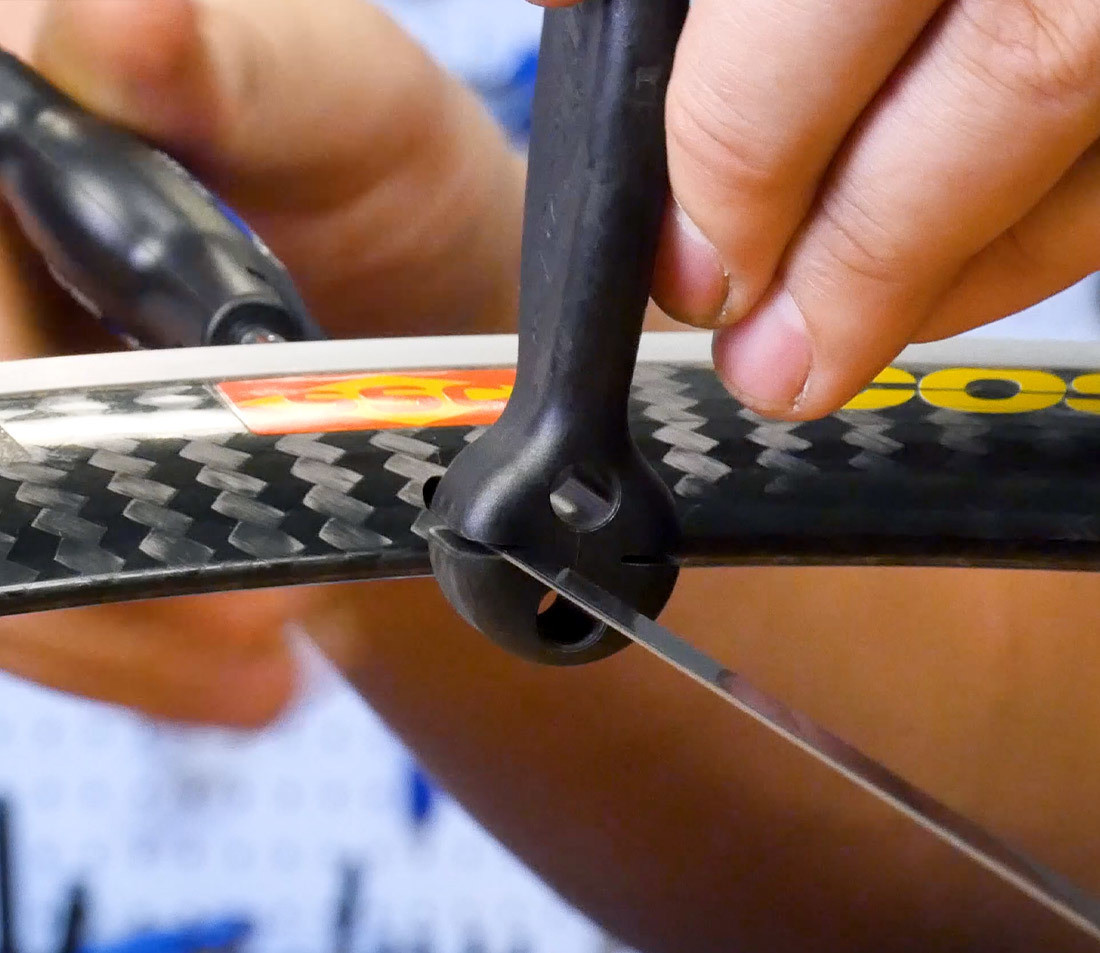
Image: SW-15 spoke wrench being used to adjust an internal spoke nipple on a carbon fiber road bike rim, showcasing the tool for this specific nipple type.
Step-by-Step Guide to Lateral Truing
Lateral truing focuses on eliminating side-to-side wobbles. Here’s how to do it:
- Locate the Lateral Deviation: Spin the wheel and slowly move your indicator towards the rim’s sidewall. Watch closely for the point where the rim gets closest to the indicator. Continue moving the indicator inward until it lightly touches the spinning rim. Stop the wheel at this contact point. This is the most significant lateral deviation.
- Isolate the Responsible Spokes: Determine which spokes are pulling the rim in the wrong direction. If the rim deviates to the right, you need to tighten spokes that originate from the left flange of the hub (and vice versa). Find the spoke closest to the center of the deviation.
- Correct the Deviation: Using your spoke wrench, tighten the nipple of the identified spoke. Start with small adjustments, like a 1/4 turn (90 degrees). For larger deviations, you might need up to a 1/2 turn (180 degrees). After each adjustment, spin the wheel and check your progress.
- Repeat and Alternate Sides: After making a correction, spin the wheel again to find the next largest deviation, potentially on the opposite side of the rim. Alternate between correcting deviations on both sides to maintain wheel centering. Make about three corrections on one side before switching to the other.
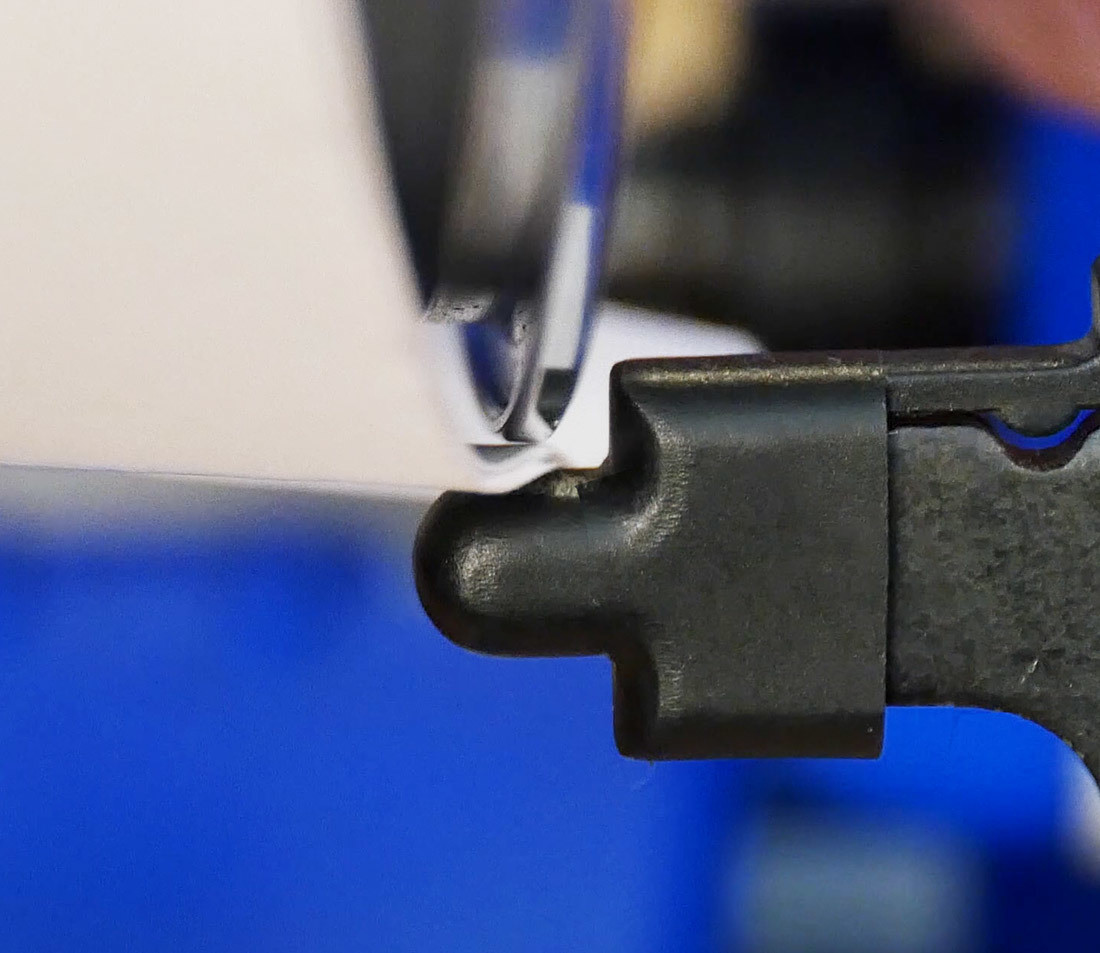
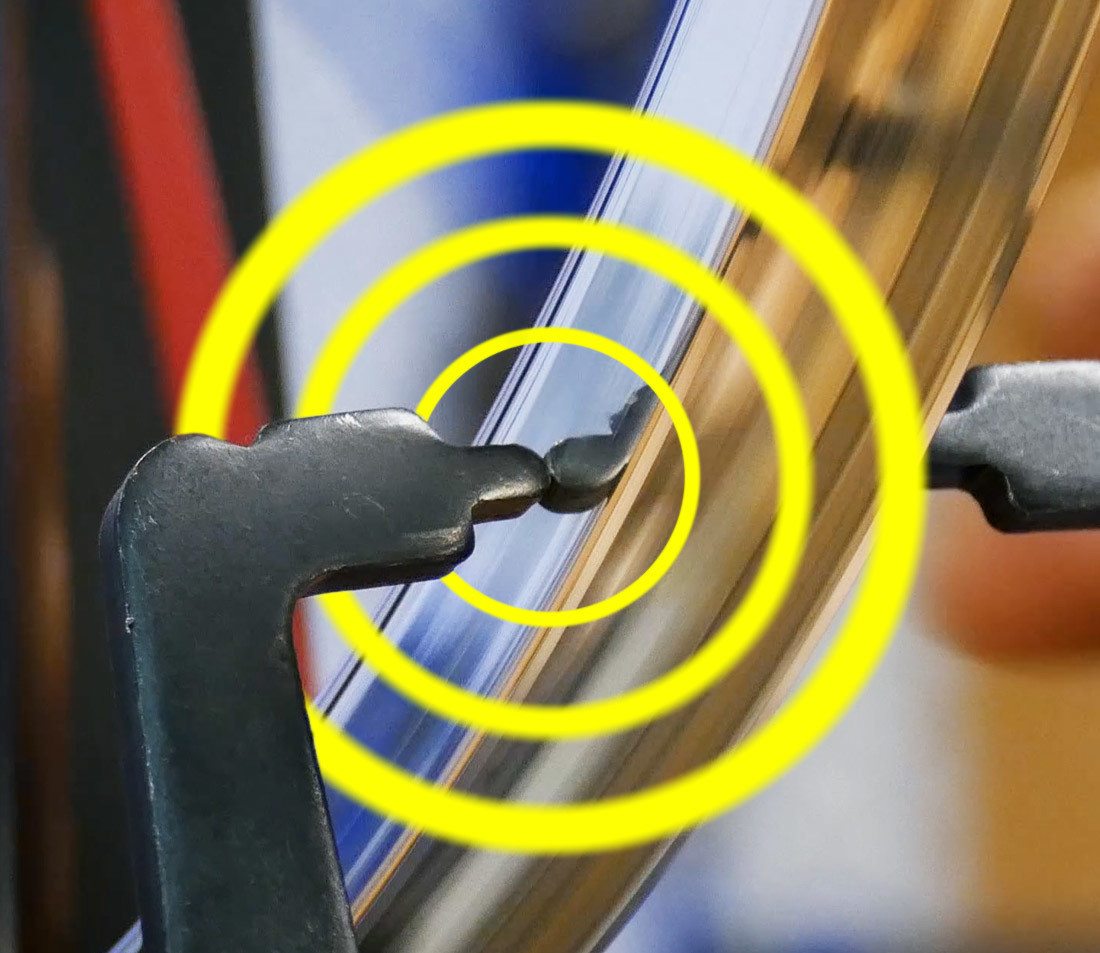 Truing stand making contact with sidewall of bicycle rim
Image: Truing stand indicator making contact with the sidewall of a bicycle rim, illustrating the process of locating a lateral deviation.
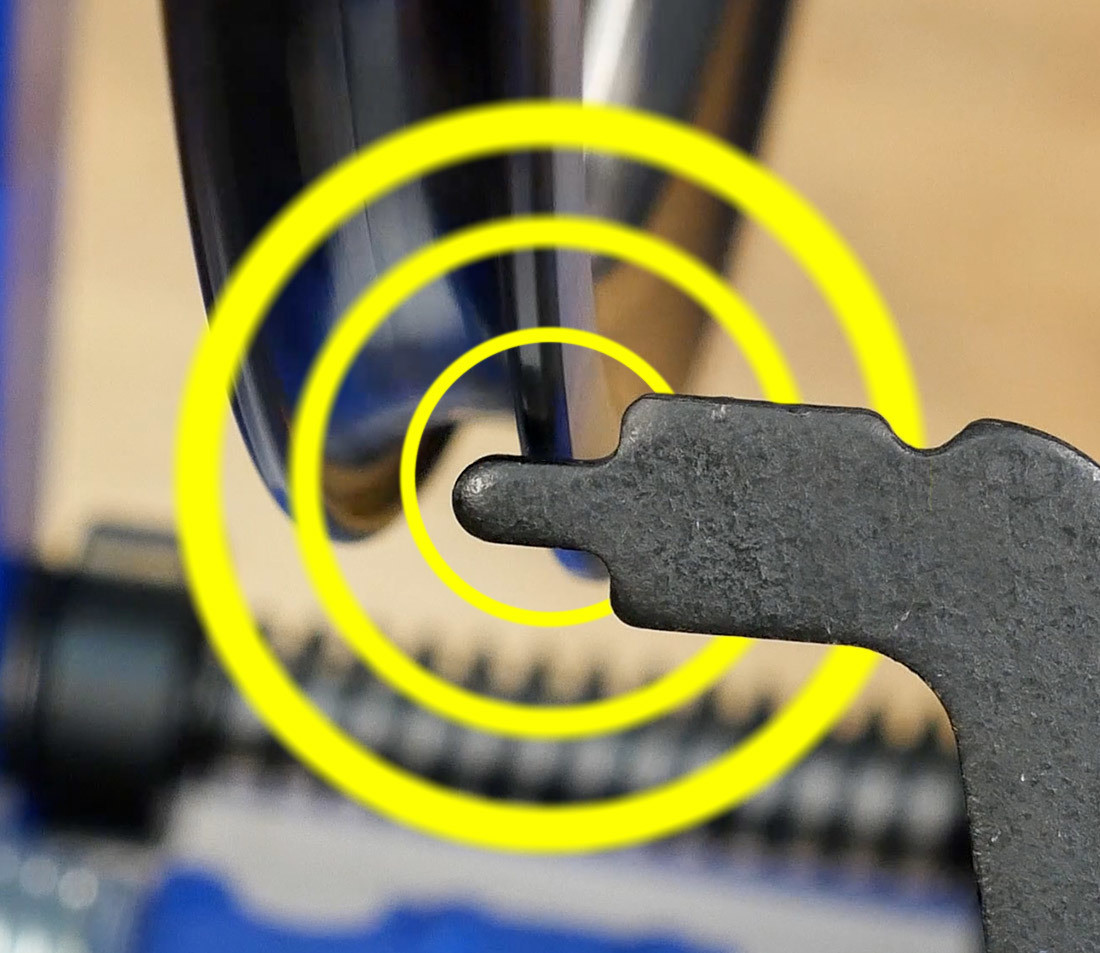
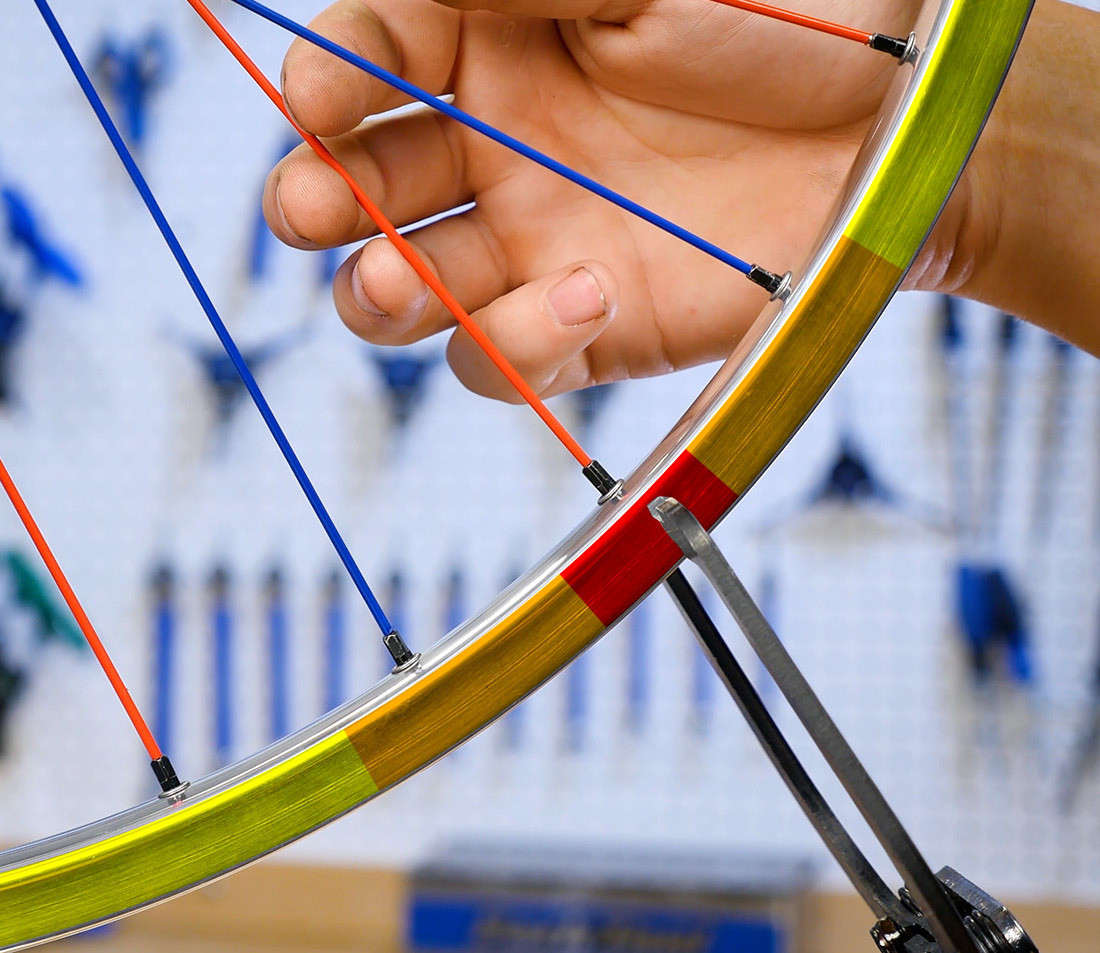 Bicycle wheel in truing stand with red, orange, and yellow highlights radiating from a spoke
Image: Bicycle wheel in a truing stand with color highlights indicating a lateral deviation and spokes that need adjustment to correct it.
Knowing When Lateral Trueness Is Sufficient
How straight is “straight enough”? It depends on your preferences and bike type. For rim brakes, even minor wobbles can cause brake rub. A general target for lateral trueness is less than 0.5 millimeters of deviation.
Using a Paper Gauge: Visualize 0.5mm by using about five sheets of standard printing paper as a feeler gauge. If you can fit five sheets of paper between the indicator and the rim at the widest deviation point, further truing is recommended.
Continue refining lateral trueness until you are satisfied. However, keep in mind that radial truing might introduce new lateral deviations, so don’t aim for absolute perfection at this stage.
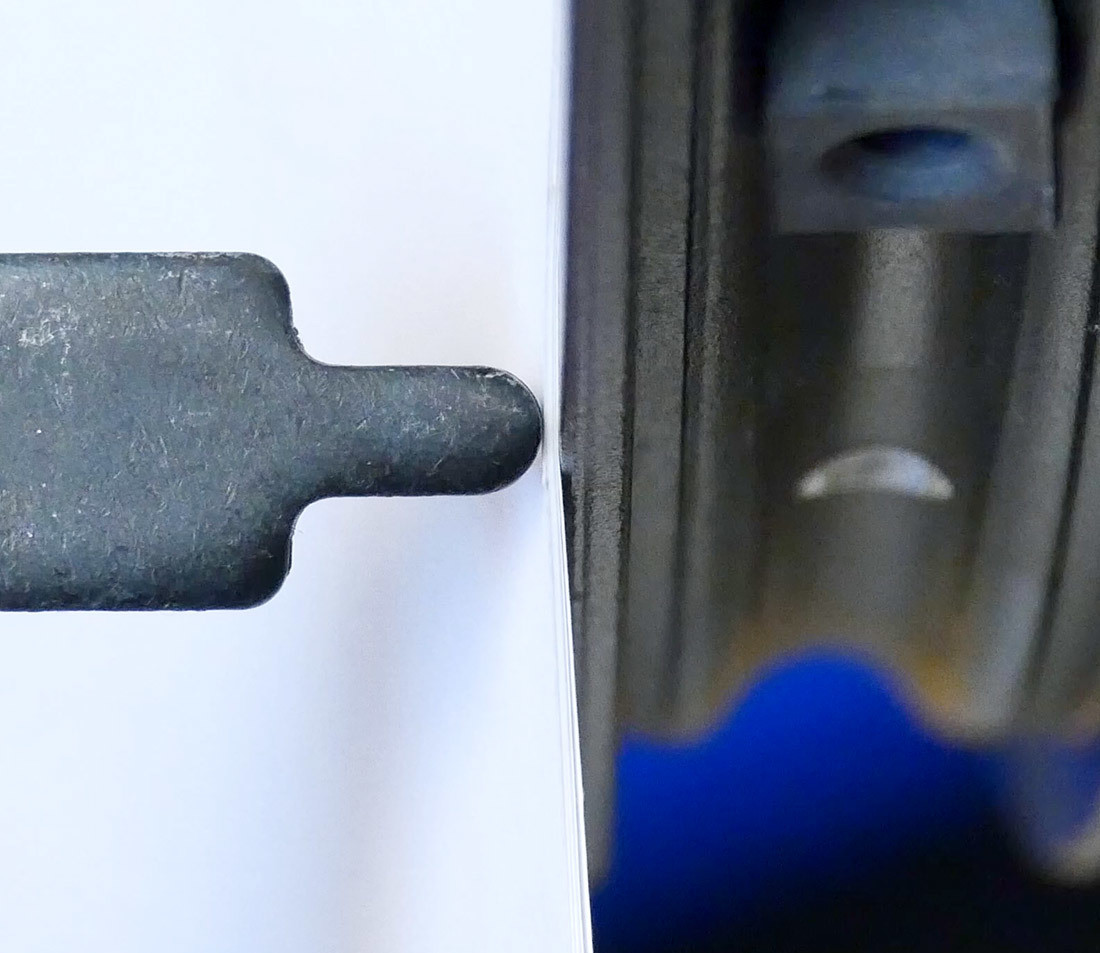 Stack of paper between truing stand indicator and wheel being trued
Image: Stack of paper being used as a gauge between a truing stand indicator and a bicycle wheel rim to measure lateral deviation.
Step-by-Step Guide to Radial Truing
Radial truing corrects up-and-down deviations, making the wheel rounder. This can be more challenging and may require going back and forth with lateral truing.
Understanding Radial Deviations:
- Low Spot: A section of the rim that moves inward, towards the hub, as the wheel spins.
- High Spot: A section of the rim that moves outward, away from the hub.
- Locate a High Spot: Spin the wheel and position your indicator just below the rim’s outer edge. Slowly move the indicator upwards until it lightly touches the rim at the highest point. This identifies a high spot.
- Isolate the Responsible Spokes: High spots are corrected by reducing tension on spokes in that area. For a high spot, you will typically loosen pairs of spokes on either side of the hub, connected to the high spot area.
- Correct the Deviation (High Spot): Loosen the nipples of the identified spoke pairs by about 1/4 to 1/2 turn. Loosen spokes evenly in pairs (one from each side of the hub) to avoid introducing lateral deviations.
- Locate a Low Spot (After Addressing High Spots): After reducing high spots, locate low spots. Spin the wheel and find areas where the gap between the rim and indicator is largest.
- Correct the Deviation (Low Spot): For low spots, you need to increase tension. Tighten pairs of spokes connected to the low spot area, again making even adjustments on both sides of the hub.
- Repeat and Alternate with Lateral Truing: Continuously locate, isolate, and correct radial deviations, alternating between high and low spots. After every few radial corrections, check for lateral trueness and make adjustments as needed.
 Truing stand making contact with bottom of bicycle rim
Image: Truing stand indicator making contact with the bottom edge of a bicycle rim, illustrating the process of locating a radial high spot.
Knowing When Radial Trueness Is Sufficient
Radial trueness is also somewhat subjective. Tire imperfections can mask minor radial deviations. A generally acceptable radial deviation is 1 millimeter or less.
Using a Paper Gauge: 1mm is approximately ten sheets of printing paper. Use this as a feeler gauge to visualize the acceptable deviation.
Continue refining radial trueness until you are satisfied with the wheel’s roundness, keeping in mind the diminishing returns and potential need for further lateral adjustments.
 Bottom edge of rim and truing stand indicator underneath with 10 pieces of paper in between
Image: Ten sheets of paper used as a gauge between a truing stand indicator and the bottom edge of a bicycle wheel rim to measure radial deviation.
De-Stressing Your Wheel
After significant spoke adjustments, it’s beneficial to de-stress the wheel. This allows spokes to unwind and settle, preventing future trueness issues. The easiest way to de-stress a wheel is to ride the bike. You might hear some popping or pinging sounds initially, which is normal as spokes settle.
Limitations: When Wheel Truing Isn’t Enough
Sometimes, wheel damage is beyond repair through truing alone. Consider these limitations:
- Rim Damage: Bent or damaged rims from impacts might not be fully truable. If spoke tension adjustments don’t correct a wobble, the rim might be bent and require replacement.
- Corroded Nipples: Corrosion can seize spoke nipples, making truing impossible. Regular lubrication of spoke nipple threads can prevent this.
- Spoke Damage: Bent or broken spokes compromise wheel integrity. While a single broken spoke can be replaced, frequent spoke breakage indicates a wheel rebuild or replacement is needed. A good rule of thumb is “3 broken spokes = 1 new wheel.”
By following these steps and understanding the principles of wheel truing, you can effectively maintain your bike wheels, ensuring smoother rides and extending the lifespan of your components. Remember to be patient, make small adjustments, and enjoy the satisfaction of a well-trued wheel!
Further Reading on Wheel Maintenance:
- Wheel Dishing (Centering): View Article
- Spoke Tension Measurement and Adjustment: View Article
- TS-2Di Dial Indicator Use in Wheel Truing: View Article